
Best Boat Insurance for Florida Boat Owners
A good day on the water can turn expensive fast when a lower unit meets an unmarked obstruction, a storm
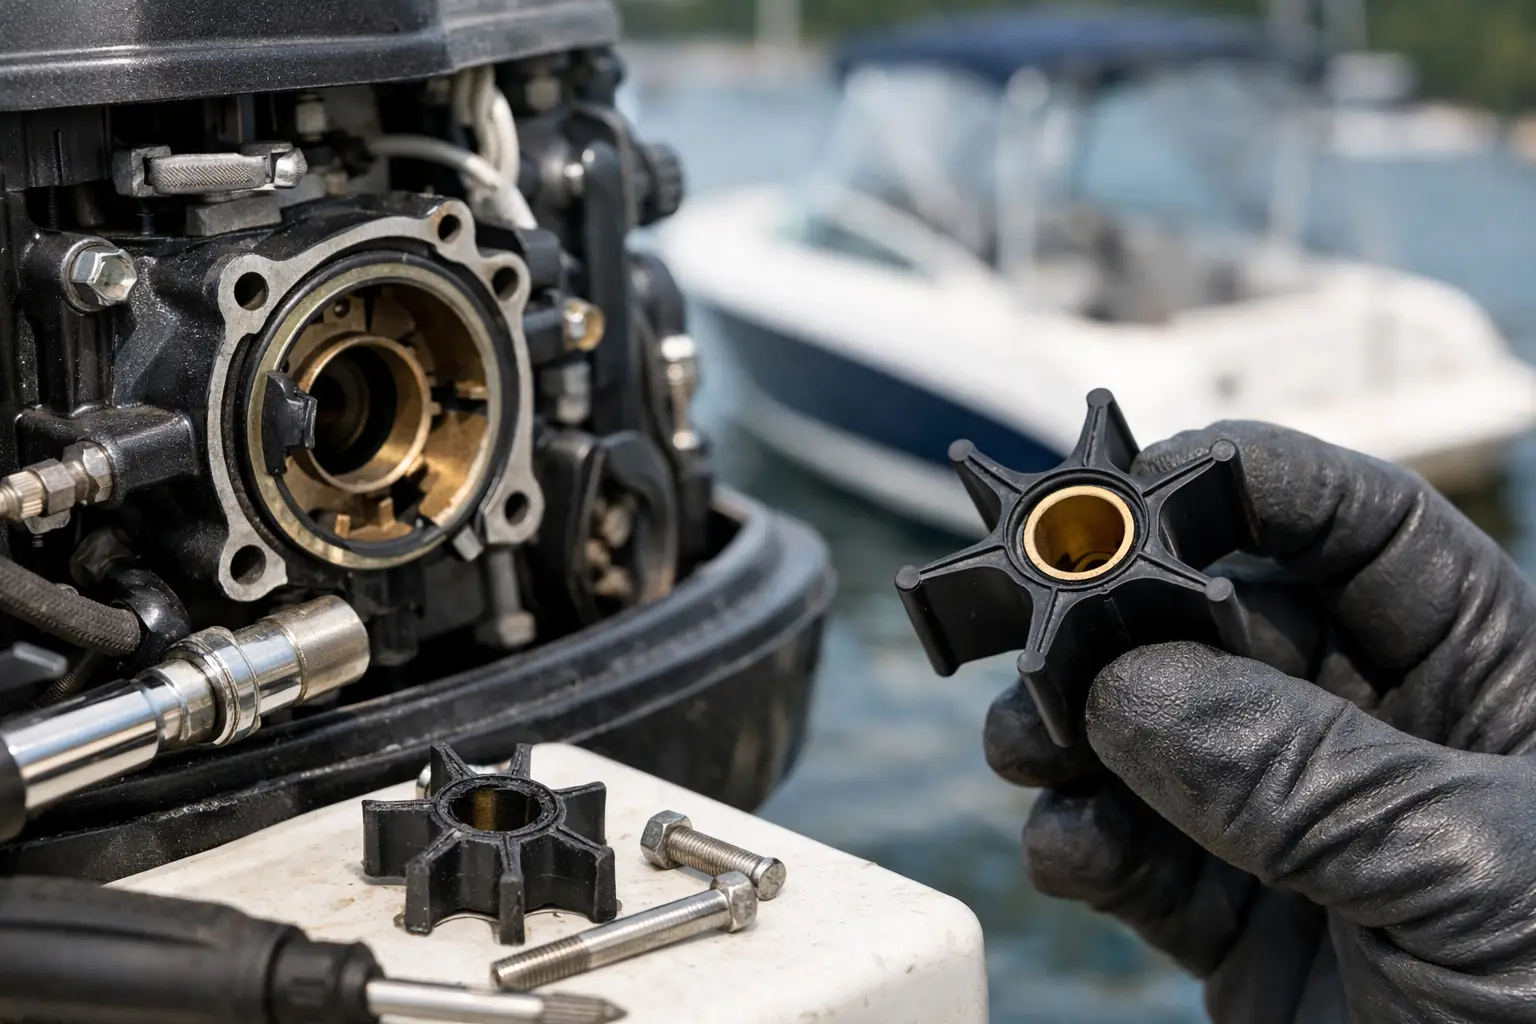
Throughout my Coast Guard career, I have changed out an impeller a time or two. Full clarity: it’s not fun. However, a weak stream from the telltale, a rising temperature gauge, or an overheat alarm can turn a good day on the water into an expensive tow. Knowing when to replace boat impeller components is one of the most valuable maintenance habits a boat owner can have. This small rubber part moves raw water through the cooling system, and when it fails, it can put your engine at risk fast.
The job is usually straightforward, but it is not one to rush. The right impeller, a clean pump housing, proper vane direction, and a careful test afterward matter more than brute force. Whether you run an outboard, sterndrive, or an inboard with a belt-driven raw-water pump, the principle is the same: protect the cooling system before heat has a chance to do damage.
For many recreational boats, replacing the impeller every year or every 100 operating hours is a sensible baseline. Some manufacturers specify a different interval, and the engine manual always gets the final say. A lightly used boat stored in a mild climate may appear to need less attention, but rubber still ages. Florida heat, salt air, dry starts, and long periods of sitting can all shorten impeller life.
A failed impeller does not always give a clear warning. The boat may idle normally but run hot at higher rpm, where the cooling system needs more water. On an outboard, a weak or inconsistent telltale stream is a common clue, although a blocked telltale outlet can also cause it. On an inboard or sterndrive, watch the temperature gauge and exhaust-water discharge.
Replace the impeller promptly if you notice an overheat alarm, a temperature rise above normal, reduced water flow, a squealing raw-water pump, or rubber fragments in the strainer or pump. Do not assume the old impeller is the only problem. Missing vanes may have traveled farther into the cooling circuit, where they can restrict flow even after a new impeller is installed.
The replacement process depends on where the pump lives. On most outboards, the water pump is in the lower unit above the gearcase. Replacing it generally means removing the lower unit and servicing the entire water pump assembly. On many sterndrives, the impeller may be in the lower unit, the engine-mounted seawater pump, or both, depending on the drive and engine package. Inboards commonly use an engine-mounted raw-water pump behind a small cover plate.
Before ordering parts or picking up tools, confirm the engine make, model, serial number, and year. An impeller that looks close is not necessarily correct. Shaft size, hub style, vane count, pump depth, gaskets, wear plates, and housings vary by application. A complete pump kit is often the smarter choice when the housing or wear plate shows grooves, corrosion, or heat damage.
If you are uncertain which pump your boat uses, stop and verify it before disassembly. That small pause is cheaper than opening the wrong component the night before a fishing trip.
Have the correct impeller or pump kit, the specified gasket or O-ring, and the manufacturer-approved lubricant ready before opening the pump. A basic socket set, screwdrivers, needle-nose pliers, a small pick, clean rags, and a flashlight cover most engine-mounted pumps. Lower-unit services may also require a torque wrench, gearcase oil supplies, and the tools needed for your engine’s shift linkage and trim tab hardware.
Avoid petroleum grease unless the manufacturer specifically calls for it. Dish soap, glycerin, silicone-based impeller lubricant, or the lubricant included with a quality kit are commonly used to help the vanes slide into the housing during assembly. The goal is to prevent a dry first rotation, not to coat the pump with something that may harm the rubber.
Start with the boat secured, the engine off, and the ignition key removed. Disconnect the battery if your work area puts you near electrical connections or a starter circuit. Close the seawater intake seacock on an inboard before opening a raw-water pump. If the boat is on a trailer, make sure it is properly supported and stable before working around the lower unit.
Remove the pump cover or lower unit according to the manufacturer’s service procedure. Take a few clear photos before touching the old impeller, especially if hoses, cover plates, or shift-linkage parts will be moved. Keep bolts in order. Pump-cover screws can vary in length, and forcing a long screw into the wrong hole can crack the housing or damage the threads.
On an engine-mounted pump, loosen the cover screws evenly. Catch any water left in the pump with a rag. On an outboard lower-unit service, follow the correct gear position and linkage instructions for your model. This is where a service manual earns its place in the toolbox.
Pull the impeller straight out as carefully as possible. Two screwdrivers can help, but protect the housing and avoid gouging the sealing surfaces. An impeller puller is a better choice for a stubborn unit.
Look for cracked, stiff, permanently bent, or missing vanes. A little set in the vanes is normal after use; deep cracks and brittle rubber are not. If a vane is missing, account for it. Check the pump outlet, hoses, thermostats, coolers, and other downstream areas where pieces could lodge. Installing a new impeller without finding those fragments may leave you chasing an overheating problem that never truly went away.
Inspect the cam, wear plate, cover, and housing as well. Grooves in the cover or wear plate can allow water to slip past the impeller rather than flow through the system. Corrosion around the housing, a warped cover, or blue-black heat marks are signs that replacing only the rubber impeller may not be enough.
Clean the pump cavity and gasket surfaces with a lint-free rag. Do not use aggressive abrasives that can damage the sealing surface. Install new gaskets, O-rings, wear plates, and seals included in the kit where applicable.
Lubricate the new impeller lightly, then insert it while bending the vanes in the direction the shaft rotates. On a pump you can turn by hand, rotate the shaft while pressing the impeller in. If the old impeller’s vane direction is visible, use it as a reference, but confirm rotation from the engine manual when possible. In many pumps, the vanes will flip into position on startup if installed backward, but setting them correctly reduces dry friction and gives the pump its best start.
Install the cover evenly and tighten fasteners to the specified torque. Over-tightening small cover screws is a common and avoidable mistake. It can distort the cover, strip threads, or create a leak path.
Reinstall the lower unit or reconnect the pump plumbing exactly as it came apart. Confirm the seacock is open on an inboard before starting. For an outboard or sterndrive on a trailer, use properly fitted flushing muffs or the manufacturer’s approved flush connection. Do not run the engine dry, even for a few seconds.
Start the engine and immediately verify water flow. Watch the telltale on an outboard, inspect the pump and hose connections for leaks, and monitor the temperature gauge. Let the engine reach normal operating temperature only while following the proper water-supply procedure for your engine. If the alarm sounds, the temperature climbs, or the water flow remains weak, shut down and investigate instead of hoping it will clear on its own.
The fastest way to damage an impeller is a dry start. This can happen after launching when an inboard seacock is left closed, when a hose is pinched, or when an outboard is started before it is in the water or connected to flushing muffs. Even a brief dry run can burn vane tips and leave rubber residue inside the cooling system.
Another common issue is treating the impeller as the only maintenance item. A clogged intake, a cracked suction hose, an air leak, a worn pump cover, a blocked cooler, or a stuck thermostat can cause the same overheating symptoms. Replacing the impeller is good preventive maintenance, but diagnosis still matters when the engine has already run hot.
For boats that sit through a long off-season, consider removing the impeller or at least inspecting it before the first serious run. Leaving vanes compressed in one position for months can cause them to develop a permanent set. It is a small job that can save a weekend, an engine, and a lot of frustration at the ramp.
A fresh impeller is inexpensive insurance, but only when the whole cooling path gets the attention it deserves. Make the service part of your regular maintenance rhythm, keep the correct spare aboard, and you will have one less reason to cut a good day on the water short.
Safe Boating,
William B.
A good day on the water can turn expensive fast when a lower unit meets an unmarked obstruction, a storm
A calm morning at the ramp can make any boat look like the right boat. The real difference shows up